Most wallet security guides stop at ‘use a hardware wallet’ and ‘don’t click suspicious links.’ That advice is useful, but it’s not enough when attacks happen in seconds and approvals can outlive your attention span.
If you hold meaningful value in self-custody, you need a kill-switch mindset: a preplanned response that you can execute quickly when you suspect a wallet compromise. This guide gives you a practical, no-hype workflow you can run in about 30 minutes for setup, then reuse during real incidents.
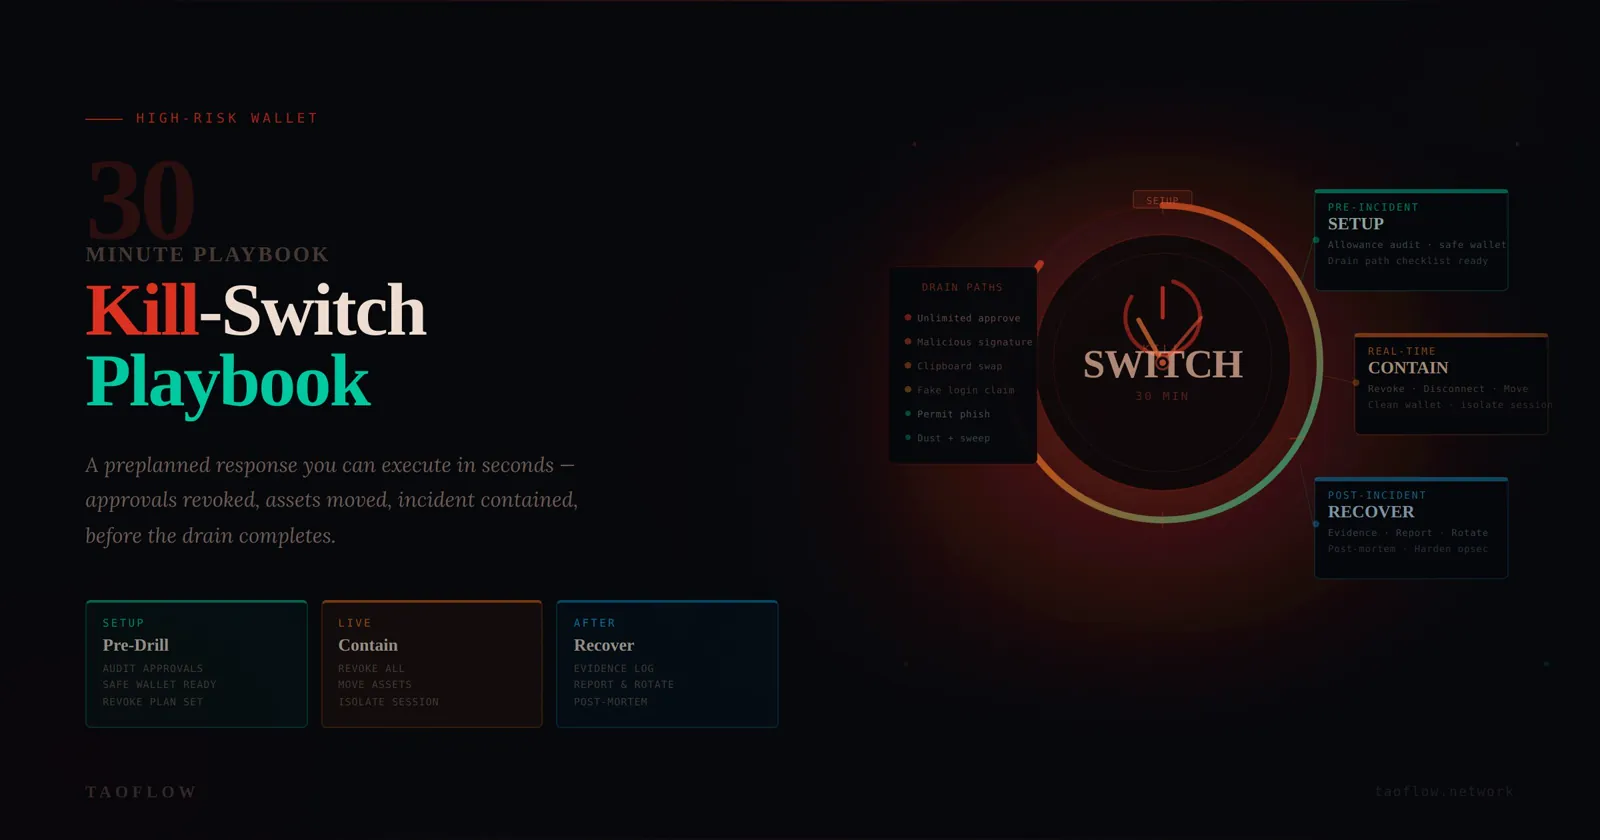
Why wallet drains happen so fast
A modern wallet drain usually doesn’t require stealing your seed phrase. Attackers often win by tricking you into signing a malicious approval or transaction. Once approved, a contract can move assets without asking you again, depending on the permissions you granted.
Common drain paths:
- Unlimited token approvals granted to malicious contracts
- Signature requests disguised as routine login or claim actions
- Clipboard/address substitution combined with social pressure
- Compromised browser extension sessions
The key lesson: compromise is often a workflow failure, not just a tool failure. So your defense must also be workflow-based.
Build your wallet kill-switch baseline (do this before any incident)
1) Split funds by role, not by convenience
Create at least three wallet roles:
- Vault wallet (cold, minimal activity): long-term storage
- Ops wallet (regular activity): day-to-day DeFi/trading/NFT actions
- Burner wallet (high-risk interactions): new dApps, links, and experiments
Rules:
- Never connect vault wallet to new dApps
- Never keep large balances in burner wallet
- Move only task-sized amounts from vault to ops/burner
This single change massively reduces blast radius.
2) Predefine trusted transfer destinations
Prepare a short allowlist of destination addresses you control (for example, vault and emergency addresses). Save them in at least two independent places (password manager + offline note).
When stress hits, your brain is unreliable. A predefined destination list prevents rushed copy/paste mistakes and address poisoning traps.
3) Maintain an approval review cadence
Set a recurring weekly check:
- Review token approvals on each active chain
- Revoke allowances you no longer need
- Flag any unknown spender immediately
Don’t wait for an incident to discover six months of stale unlimited approvals.
4) Prepare a one-page incident card
Create a short checklist titled: “If suspicious signature/drain, do this now.” Keep it easy to access from phone and desktop. Include:
- Your trusted destination addresses
- Links to your preferred allowance revocation tools
- Exchanges/accounts where API keys or sessions must be revoked
- A contact method for your team/partner if applicable
Think of it like a fire plan. You don’t write it while the building is burning.
Trigger conditions: when to activate kill-switch mode
Start kill-switch mode immediately if any of these occur:
- You signed a transaction you did not fully understand
- You approved a contract after arriving from a suspicious link
- New outbound transfers appear that you didn’t initiate
- Wallet UI prompts repeat unexpectedly for approvals
- A trusted dApp URL suddenly changed or requested unusual permissions
False alarms are acceptable. Delayed response is expensive.
The 30-minute containment workflow
Minute 0–5: Isolate and stop further signing
- Disconnect your device from risky browsing activity (close tabs, stop interacting).
- Do not sign any additional transactions “to fix” the issue unless they are part of your predefined plan.
- If compromise likely started from a specific browser profile/device, stop using it for wallet actions immediately.
Goal: prevent additional approvals while you regain control.
Minute 5–15: Move remaining assets from exposed wallet
From a clean environment (ideally separate device/profile), transfer remaining assets to your predefined safe destination(s). Prioritize:
- Native token needed for gas (retain enough to complete urgent steps)
- Stablecoins and most liquid assets
- NFTs/high-value tokens
Operational notes:
- Send test transaction first when possible
- Verify first/last 6+ characters of destination address against allowlist
- Avoid ad hoc destination addresses during panic
If the attacker is actively draining, speed matters more than elegance. Partial rescue is still success.
Minute 15–25: Revoke dangerous approvals
Now remove contract permissions from the exposed wallet:
- Revoke unknown/unnecessary spenders first
- Focus on high-balance tokens first
- Confirm each revocation transaction details before signing
If gas or chain congestion blocks full cleanup, prioritize top-risk allowances and continue later from a clean environment.
Minute 25–30: Lock down related accounts
Compromises can chain across systems. Immediately:
- Revoke active sessions for exchange/email/social accounts tied to wallet operations
- Rotate passwords for critical accounts
- Rotate or delete old API keys
- Verify authenticator app/device integrity
Many losses escalate because attackers pivot into centralized accounts after an on-chain foothold.
Post-incident recovery (same day)
Containment is not closure. Within 24 hours, complete a structured recovery:
1) Reconstruct the timeline
Document:
- Suspected entry point (URL, message, dApp, signature time)
- First unauthorized action
- Chains/assets impacted
- What containment actions were taken and when
This improves future detection and helps collaborators avoid repeated mistakes.
2) Retire or demote the exposed wallet
If compromise confidence is high, treat the wallet as tainted:
- Stop using it as primary ops wallet
- Migrate workflows to a fresh wallet
- Keep old wallet only for investigation or final cleanup
3) Rebuild with tighter permission hygiene
When establishing the replacement wallet setup:
- Default to minimal approvals where possible
- Use burner wallet for unknown protocols
- Set weekly approval audits on calendar
- Keep transaction verification ritual strict and boring
4) Run a tabletop drill monthly
Practice the first 10 minutes with your real tools and addresses. Time yourself.
Muscle memory reduces panic and dramatically improves outcomes.
Common mistakes that worsen losses
- Trying to investigate first, contain later: always contain first.
- Using the same compromised environment to recover: switch context/device/profile.
- Moving everything to a fresh but unverified address: check allowlist carefully.
- Assuming one chain means one problem: review all active chains and connected services.
- Skipping written notes: memory is weakest under stress.
A practical verification ritual before every signature
To reduce future incidents, apply this micro-check before signing:
- Intent: Why am I signing this?
- Origin: Is the domain and path exactly expected?
- Permission: Is requested scope minimal and time-appropriate?
- Consequence: What can happen if this approval is abused?
If any answer is unclear, stop. Delay is cheaper than recovery.
Minimal tool stack you actually need
You don’t need an enormous security stack. For most users, this is enough:
- Hardware wallet for vault role
- Separate browser profiles for ops vs exploration
- Password manager for address allowlist + incident card
- Approval monitoring/revocation routine
- A private network habit for sensitive sessions (for example via TaoFlow)
Security maturity is mostly consistency, not complexity.
Final checklist (copy/paste)
Pre-incident:
- [ ] Vault / Ops / Burner wallet separation
- [ ] Trusted destination allowlist (dual backup)
- [ ] Weekly approval review schedule
- [ ] One-page incident card ready
During incident (first 30 min):
- [ ] Stop further signing and isolate risky environment
- [ ] Move remaining assets to safe destination
- [ ] Revoke high-risk approvals
- [ ] Revoke sessions, rotate passwords/API keys
After incident (24h):
- [ ] Timeline and root cause notes
- [ ] Retire or demote exposed wallet
- [ ] Rebuild with stricter permissions
- [ ] Schedule next tabletop drill
A wallet incident is never convenient, but it doesn’t have to become catastrophic. If you prepare a kill-switch workflow now, you’ll make better decisions when every minute counts.