Most crypto users think about wallet recovery only after something breaks: a lost phone, a corrupted laptop, a stolen seed phrase card, or malware that forces a full reinstall. By then, stress is high and mistakes are expensive.
A better approach is simple: run a scheduled recovery drill before an incident happens. This article gives you a practical, low-cost workflow you can complete in under two hours, then repeat every quarter.
Why recovery drills matter
Security is not just preventing compromise. It is also restoring access safely when normal access fails. In crypto, recovery failure can become permanent loss.
A recovery drill helps you answer three critical questions:
- Can I still access my funds if my primary device disappears today?
- Are my backups complete, legible, and mapped to the right wallets/accounts?
- Can I recover without exposing sensitive material to new risk?
If you cannot answer all three with confidence, your setup is unfinished.
Threat model: what this drill is designed for
This workflow focuses on common, high-probability failures:
- Lost, stolen, or damaged phone/laptop
- Broken password manager sync
- Incomplete or mislabeled seed phrase backups
- Locked-out 2FA during travel
- Last-minute panic actions that leak secrets
It does not replace advanced custody design, but it dramatically improves real-world resilience for everyday users.
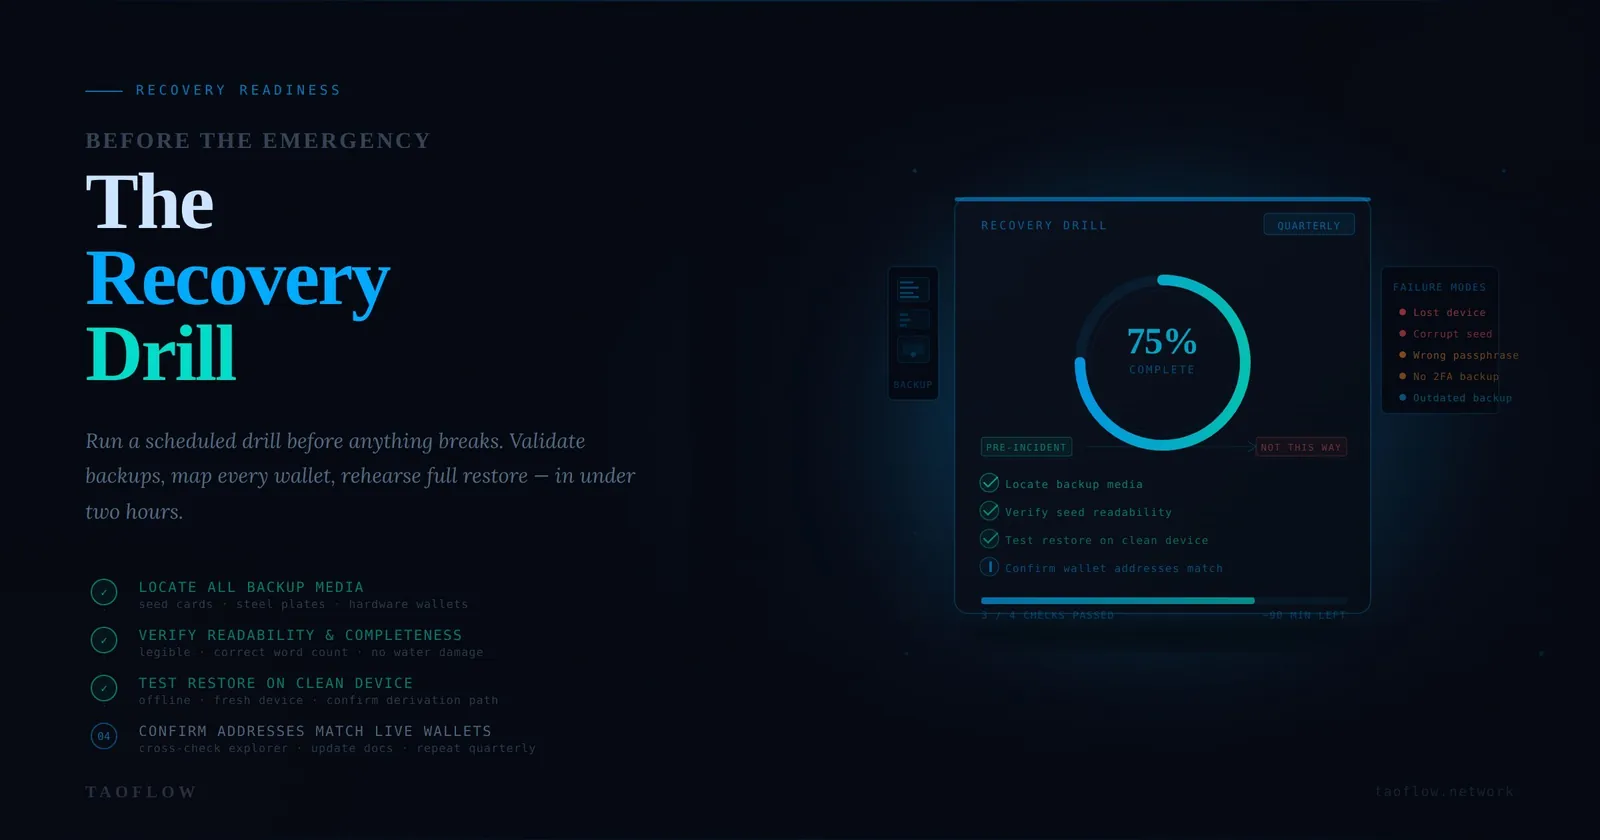
The 90-minute recovery readiness drill
Pick a quiet time. Turn on airplane mode on your test device unless internet is required for a specific check. Use a paper checklist and physically tick each step.
Phase 1 (15 min): Build your recovery inventory
Create a one-page inventory (paper or encrypted note) with:
- Wallet name
- Chain/network
- Purpose (daily spend, long-term storage, trading)
- Backup type (seed phrase, hardware wallet + PIN, social recovery, multisig)
- Backup location(s)
- Required dependencies (2FA app, passphrase, recovery file, signer device)
Goal: eliminate hidden dependencies. Many users have the seed phrase but forget a passphrase, device PIN, or the exact derivation/account path they used.
Phase 2 (20 min): Verify backup quality, not just backup existence
For each wallet backup, confirm:
- Completeness: all words/characters are present
- Order correctness: sequence is explicit
- Readability: no ambiguous handwriting
- Integrity: medium not water-damaged/faded
- Label clarity: you know exactly which wallet it restores
Red flags to fix immediately:
- Two similar seed cards with unclear labels
- Photos/screenshots of seed phrases in cloud albums
- One and only one backup location
- Backup copied by someone else with unknown handling
Phase 3 (25 min): Run a controlled restore test
Use a clean secondary environment (spare phone, wiped laptop profile, or dedicated test VM).
- Install wallet software from a verified source.
- Import one low-risk wallet backup (start with a wallet holding minimal funds).
- Confirm addresses match your known address list.
- Verify balance visibility on chain explorer.
- Sign a harmless message or create a small internal transfer plan without broadcasting if possible.
Important: this is a test restore, not a migration. Do not move main funds during the first drill.
Phase 4 (15 min): Validate account recovery dependencies
Check the services around your wallet operations:
- Exchange accounts: recovery email + 2FA backup codes available
- Password manager: offline/export recovery path verified
- Authenticator app: backup/transfer path tested
- SIM swap risk controls: carrier PIN/passcode enabled
If one dependency fails, wallet access can still be blocked at a critical moment.
Phase 5 (15 min): Write your incident play card
Create a one-page “If X, then Y” card:
- If device stolen → freeze exchange withdrawals, rotate email password, rotate session tokens
- If seed exposure suspected → move funds to pre-created clean wallet
- If malware suspected → stop signing, isolate device, restore from clean system
- If unsure about a transaction request → pause and run your verification checklist
Store this card separately from seed phrases. Under pressure, a short play card reduces emotional decisions.
Recovery readiness checklist (quarterly)
Use this as your recurring checklist:
- [ ] Inventory updated after every new wallet/account
- [ ] Backup media inspected for damage
- [ ] One successful test restore completed this quarter
- [ ] 2FA backup codes refreshed and reachable
- [ ] Carrier anti-SIM-swap lock confirmed
- [ ] Emergency contacts/process documented
- [ ] Known-good software download/bookmark list verified
If you can check every box, you are already ahead of most users.
Common mistakes that break recovery
- No dry run: assuming backup works without testing
- Single-location storage: one fire/flood/theft event wipes everything
- Mixing prod and test carelessly: exposing main seed during experiments
- Unverified software sources: restoring into a fake wallet app
- No address baseline: unable to confirm restored wallet is truly yours
A simple verification workflow for restore day
When real recovery is needed, follow this order:
- Verify environment (clean device, trusted network, verified software source)
- Restore wallet
- Confirm address matches baseline
- Check on-chain balances directly
- Perform low-value confirmation action first
- Only then proceed with larger fund operations
This order prevents “recover first, verify later” mistakes.
Final thought
You do not need elite tooling to improve recovery readiness. You need repetition, clear checklists, and calm verification habits. Whether you use TaoFlow or any other crypto workflow, the people who rehearse recovery before an incident are the ones who keep control when incidents actually happen.